
The system also allows you to manually check your clients in even if they don’t have any service or a prior booking.
How to Check-in your clients manually?
Step 1: Going to the “Check-in” section
You’ll find the “Check-in” option on the left side of the screen just above the “Reports” option. Just click on it to open the Check-in page.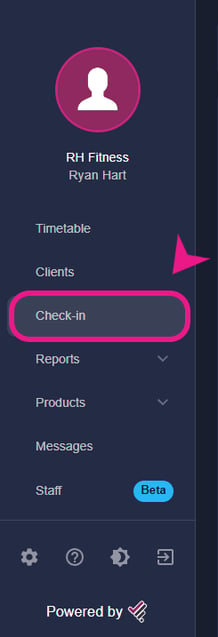
Step 2: Searching for the client
Once you are on the Check-in page, you'll be able to see a search bar. Just put the client’s name there that you wish to check in.-4.png?width=450&height=494&name=%232%20(1)-4.png)
Step 3: Checking in the client
After searching for the name of the client in the search bar, it will appear below with a tick “✔” next to it. Just click on that tick and a small window will appear with a green tick and the name of the client on it. That means the client has successfully been checked in.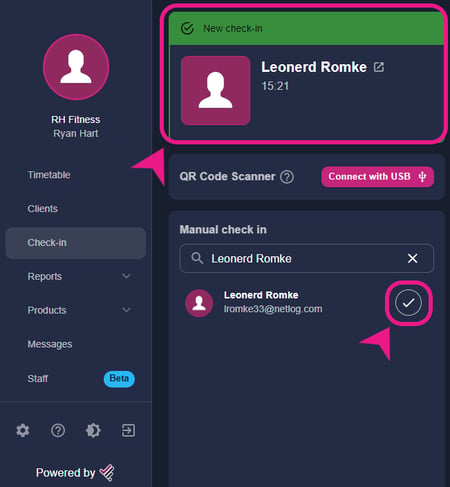 Note:- The system will show this error if the client doesn’t have any service or a valid Open Access service.
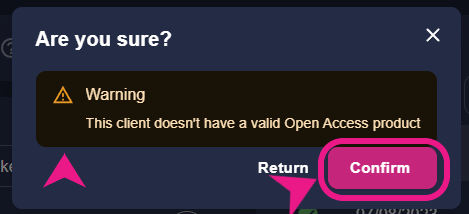
Please check the link below if you want to know how you can check in your clients using a QR Scanner Device or the QR of the app.
👉 Click the link