With our new Appointment Scheduler feature, pros can set up appointments, send reminders, and manage their availability. Appointment Scheduler also offers options such as online booking, appointment confirmations, and the ability to accept payments.
How to Setup the Appointment Scheduler?
Step 1: Go to the Timetable and select the “Add Session” button
When you are on the timetable tab, you should be able to see the “Add Session” button on the top right corner, click/select it.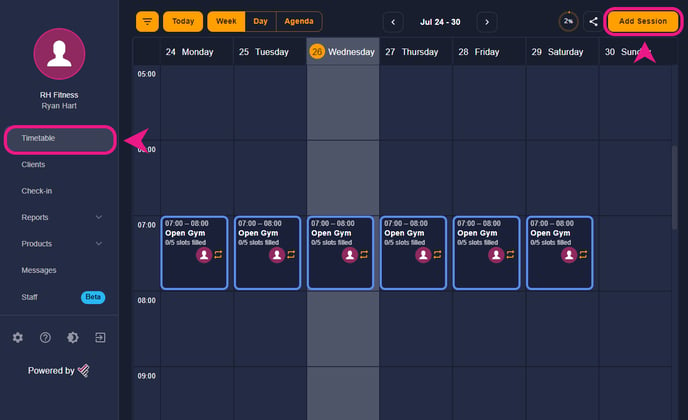
Step 2: Choose the “Appointments” option and set the time.
After clicking on the “Add Session” button, a side window will appear, in that window you’ll see the “Appointments” option” on the top. Select that option and then set the date and time of the appointments.-Aug-26-2023-06-37-30-2172-AM.png?width=318&height=572&name=%231%20(1)-Aug-26-2023-06-37-30-2172-AM.png)
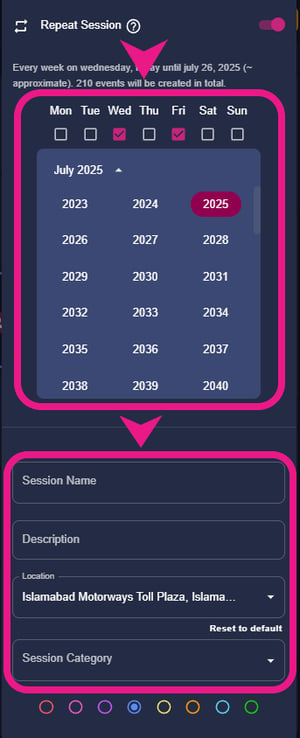
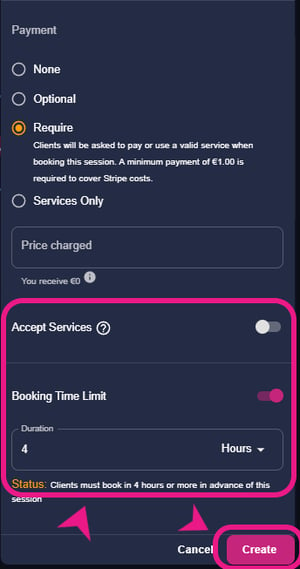
Step 3: Fill out the details and create the session.
After setting the time just fill out the rest of the details like name, description, session category, visibility, payment option, etc., or you can choose if you want to create it as recurring or just a single session then just click on the “Create” button at the bottom.